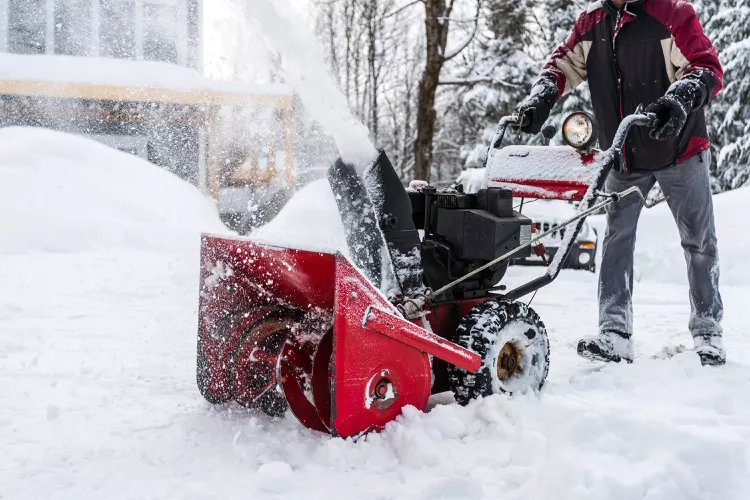
Make winter maintenance easier by learning how to start a snow blower.
When winter weather hits, most homeowners prepare for the inevitable snowfall by stocking up on ice melt, placing snow shovels in a readily available spot, and doing maintenance on the snow blower to ensure it’s ready to go when the snow starts to pile up.
However, if you recently moved into a house or just made the decision to invest in a snow blower, you may not have a good understanding of how it works or even how to start a snow blower. The good news is, once you get the snow blower started, it takes a lot less effort to clear the walkway, sidewalk, and driveway than it would if you were to stick to a shovel.
When you’re ready, pull the snow blower out of the garage or shed, then use this guide to learn how to start a snow blower to tackle the first snow of the season.
Safety Considerations
While a snow blower take less physical effort than a snow shovel, there are more safety issues to be worried about when you are using these machines. Before you start using a snow blower, make sure to follow these safety recommendations to avoid accidental injury and to prevent damage to the machine.
- Always read and follow the guide provided by the manufacturer.
- Keep up with regular snow blower maintenance, including checking the air pressure of the tires, replacing the oil and fuel as necessary, and inspecting the belts, shear pins, skids shoes, and the scraper blade.
- Clear the area of any objects that may get caught in the machine before using the snow blower.
- Always make sure to start your snow blower outdoors where the exhaust can escape freely into the air, instead of building up in a confined space.
- Use a snow blower non-stick spray on the inside of the chute and auger to help prevent snow from sticking and clogging the snow blower.
- Stay clear of the auger, chute, collector unit, and any other rotating parts while using the snow blower.
- For snow blowers with an electric start, make sure to use an outdoor-only extension cord with a grounded plug.
- Keep the extension cord elevated above the snow to avoid creating a tripping hazard or shorting out the snow blower, which can cause accidental electrocution or fire.
- Treat snow blowing like a workout: Take regular breaks and avoid overdoing it.
What You’ll Need
Equipment / Tools
- Snow blower
- Extension cord
Materials
- Oil
- Gas
Instructions
Prepare the Snow Blower Before You Begin
Most of the work that goes into starting a snow blower takes place before you even pull the start cord or press the start button. However, this prep work should never be skipped or ignored if you want the snow blower to start promptly and continue to function properly during use. Follow these steps to prepare the snow blower before you begin.
Check the Fuel Levels
The exact kind of oil and gas needed depends on the snow blower, so check the manual provided by the manufacturer to determine which fuel type and grade to use. Drain any old fuel that has sat inside the tank for more than a month, then refill the tank to prepare the snow blower for use.
Set the Choke, Throttle, and Drive Controls
Once the snow blower is refueled, set all drive controls to the ‘off’ position, then move the choke to the full position. However, if you recently used the snow blower, you only need to set the choke to the halfway or warm position.
Next, the throttle often has a picture of a turtle and rabbit to indicate the speed. Switch the throttle to the rabbit or the fast setting on the snow blower.
Turn On the Fuel Shutoff Valve and Ignition Switch
In order for the snow blower to start, you need to switch the fuel shutoff valve to the on position to allow the fuel to flow properly. Then you will have to locate and turn on the ignition switch, which tends to resemble a light switch.
Insert the Safety Key and Press the Primer Bulb
Not all snow blowers have a safety key, but if your snow blower comes with one, then you will need to insert before you can start the machine. The next step is to press down on the dome-shaped primer button to help circulate the fuel through the snow blower.
Press the primer button twice if the temperatures are above 15 degrees Fahrenheit. If the temperature is lower than 15 degrees Fahrenheit, press the primer bulb four times.
How to Manually Start a Gas Snow Blower
Pull the Starter Rope
If you have a snow blower with a manual start, then it will take a bit more effort to start than a snow blower with an electric start. Grip the starter rope well, then gently pull on the starter rope until you feel a bit of resistance.
When you are ready, pull the starter rope with a swift, steady upward motion to start the engine. If you have prepared the snow blower and the machine is working properly, it should start up right away, though you may need to pull the starter rope a few times if the engine is too cold.
Let the Snow Blower Run to Warm it Up
Once the snow blower has started, let the machine run for several minutes before using it. This will give the engine time to warm up, so that it doesn’t stutter or stall while you are snow blowing the walk or driveway.
Switch the Choke to the ‘Off’ or ‘Run’ Position
The choke is intended to increase the amount of fuel, while reducing the amount of air that is allowed into the engine, creating a rich mixture that makes it easier to start the snow blower. However, after starting the machine, you will need to switch the choke to the ‘run’ position. Depending on the machine, this may also be referred to as the ‘off’ or ‘open’ position. Now you are ready to start using the snow blower.
How to Start a Gas Snow Blower with an Electric Start
Connect the Extension Cord
When the snow blower has an electric start, you don’t have to worry about dealing with a starter rope. Instead, connect an outdoor-only extension cord with a grounded plug to an appropriate outlet that matches the snow blower’s voltage. Check the owner’s manual to verify the right voltage requirement for the machine.
Also, make sure to keep the extension cord elevated above the snow so that moisture doesn’t cause the snow blower to short out. This will also help avoid creating an unseen tripping hazard.
Press the Start Button
Once the snow blower is connect, push the start button in short, five-second intervals until the engine starts up and remains running. Do not rapidly push the start button, as this can put excessive strain on the starter.
Disconnect and Store the Extension Cord
When the snow blower is running properly, disconnect the extension cord and put it in a safe location. Keep in mind that if you leave an extension cord out in the snow for too long, there is a chance that it may freeze, which can damage the extension cord, so don’t wait until after you have completed the job to put away the extension cord.
Let the Snow Blower Run to Warm it Up
While you are disconnecting and putting away the extension cord, let the snow blower run for a few minutes to give it time to warm up. This helps to ensure the snow blower will operate without stuttering or stalling while you work.
Switch the Choke to the ‘Off’ or ‘Run’ Position
After the snow blower has had enough time to warm up, you can switch the choke to the ‘run,’ ‘off,’ or ‘open’ position. This will allow more air to enter the engine, creating a balanced mixture that helps the snow blower engine function efficiently. Then you are ready to start snow blowing the driveway, walkway, or sidewalk.