
Establishing a large garden can be thrilling. And onerous. If you are like us, you can clearly see the vision, parse it out into discrete buckets, and from there prioritize and then further develop task lists and dig in.
If you’re not like us, it may be a dream that feels overwhelming and insurmountable. In this post, I share the factors we contemplated not only before purchasing our property – with our dream garden goal clear in our mind – but the key steps we took prior to ever planting a seed in our garden. I believe strongly that the pre-work is 80% – or more – of what is visible today. Taking the time and investing the resources to set up a solid framework on which to build your garden is paramount to finding ease through this process.
Finding the Right Spot
How do you find the right spot for a garden? The first and most important step is to seek out a tree-free, sunny area. Yes, I love trees. Heck, I have a bachelor’s degree in Forest Management. I’m pretty much a tree hugger. But gardening in shade is not a way to feed your family or grow beautiful cut flowers. Very few things we enjoy eating thrive in shade. In my experience, a full day of sun grows an abundance of food. We have always had at least 8 hours of sunshine in our vegetable gardens. Currently, our garden receives somewhere over 10 hours of sunlight depending on where in the growing season we are.
In addition to sunlight, it is important to take into consideration the surrounding trees, if there are any to consider. Some trees play well with food, and others not so much. Another challenge of our property is the presence of black walnut trees. They grow in groves due to a toxic chemical the trees produce called juglone that essentially makes the soil inhabitable to many other shrubs and trees. Many vegetables cannot tolerate juglone and so you it is not recommended to grow food under the drip line of a walnut tree.

Hello garden? I can see you is what I said to this little sunny spot the first time I was shown this house for sale. The barn was definitely a draw, and you can see just how overgrown it was and how we’ve released her from the grips of years of overgrowth. She breathes much better now.
We had to remove several black walnut trees located down by the red barn during our pre-work phase of the garden. We also removed a blue spruce that was located smack in the middle of the garden space, its stump a daily reminder of a miscommunication between my landscaping contractor and me who had planned to dig the stump out with an excavator while installing the fence.

There’s that stump, my daily reminder of a miscommunication. It’s pretty comical how a communication breakdown has been incorporated into the garden design out of necessity. Just had to roll with it.
If tree removal is part of the process you will undertake to establish your gardens, early day sun helps dry any morning dew, and I would favor morning sun over afternoon sun for the health of your plants. Ideally, you have an open area with ample sun already, because carving a garden out of a gap in the forest is a fleeting but noble approach to gardening. I prefer to bathe my garden in sunlight, and thus did not consider heavily wooded lots when we were making the move to this town.
Assessing Your Site
It is important to understand your water source, your soil type, and how these factors will impact your garden. We don’t all inherit the farmer’s dream soil, a loam, and here in Minnesota there is a lot of heavy clay, and that’s what we have here. I will discuss how we amended our soils in a forthcoming post, so stay tuned for more on that topic.

You can see that I divided the garden up irregularly. This was dictated by the location of the gates. I wanted to be close to the garage and land on the concrete pad down by the barn, so that was the first line that was determined in the planning of the fence, even before we had finalized the shape and size. It gives a lovely sort of whimsy to the garden, don’t you think?
We chose to garden on a slight hill because the price of the property was right, in the desired school district, with a bonus red barn – and the rest of the yard was either too wooded or without a large enough sunny spot for the size garden we sought. And we didn’t want a cluster of small gardens as we knew we’d need to fence our food in for safe keeping, so a slight hill felt like a sweet spot. Alright, it was the only spot, given the housing market and our needs. And I knew I could make it work.

It is difficult to see just how much of a slope this is unless you walk it, but we had a very steep spot where the raspberries are, and amended those beds generously to mound them. The terraced blueberry raised beds on the left side demonstrate the steepness of that area of the garden.
We also chose a garden site that does not directly talk to our home. Our garden is on the side of our home, just outside our garage. Visible from our master bedroom and that’s it, this was a very large compromise for our dream garden. But the red barn and large, mostly tree-free space made up for those downsides. And, the water was close by, and we were able to run a line into the garden with a spigot so we have water inside the garden for hand-watering. Some future year we will invest in drip irrigation, but that won’t be for many years.

You can see here how the entrance to the garden is closest to the garage, the closest access point to our home. While not ideal because it’s not in our cozy backyard and is less private than we had dreamed, it is a highly productive garden and has delighted neighbors as we have worked to create an oasis. Gardens build community just by their presence, and I love that about them.
Compromise is inevitable, so prepare to prioritize your wants and needs so you can make the best decision for your food garden. For us, gardening on a slope and hand-watering was a much better concept than trying to garden in between the deep pockets of shade of our black walnut grove.
Protecting Your Investment
Once you have your site determined, make a plan for protecting your food. Who are the primary fauna that roam your property? If you don’t know, ask your neighbors. Observe. We knew we were moving to deer country. We don’t have a dog to chase animals all day long, so we knew we needed a physical barrier to protect our food garden.
There are several different types of deer fences, from 3D to electric to what we used which is a traditional agricultural fencing called fixed knot wire. Standing 8’ tall, which is the mutually agreed upon height to prevent deer from jumping, anything lower could be jumped. Heck, I’ve heard stories of deer jumping 8’ fences, but they seem content with our compost pile and buckthorn seedlings in our woods.

Look carefully and you will see a 4’ high section of chicken wire. A little excessive, but it was all they had in stock the week of this project. I secured it to the ground with landscape staples and added a generous 4” of wood chips on top to bury the wire underground.
While our fence was installed, we made sure to also rabbit-proof it at the same time. We learned this the hard way in our previous home garden, where we created mounded in-ground raised beds for the first time, and the rabbits sauntered into our backyard and just mowed stuff down. So, I added 12” chicken wire that I stapled to the fence and then buried below ground and secured with landscape pins to “rabbit-proof” our backyard. Crazy? Yeah, I’m crazy about growing food. And happy to report it worked.
Within your fence, you want to think about how you will access the space, where you will situate your doors, where your water will come in and out, and how you will divide the space up once you’re all fenced in. Are there any materials or things you’d want to get done on the inside before the fence gets installed? Do you want to pour a concrete patio or have a brick patio installed? Might be easier to get material in and out of the garden if it’s not fenced or if the doors are built extra wide to accommodate larger small tractors. We built ours with 5’ wide doors to accommodate our large riding lawn mower, though we’ve never driven it into the garden.
Establishing Main Paths & Features
A large, empty space can be divided countless ways, so having a sense of your main anchoring features is really helpful when designing and implementing your dream garden – or a garden of any size, to be honest. Hand in hand with our espalier trellis installation was the laying out and preparing of every single bed where we planned to grow food.

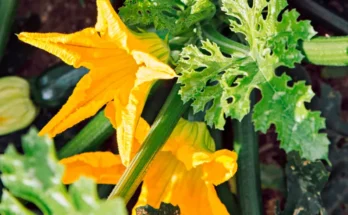
I used tape measures, stakes, and spray paint to layout the garden three years ago when we were puzzling how to make the most of the protected space. Now we wish we had made it a little larger, and are experimenting with deer resistant food gardening outside the fence such as onions, garlic, and zucchini, all so far deer resistant two years in a row.
I knew long before I had this garden that I wanted an outdoor room in my dream garden. It was in the center of my dream garden, with four quadrants fanning out from the central pergola. But, alas, our real life garden is on a hill and oddly shaped and we didn’t divide the garden up into equal parts, so our garden patio is where it is. And somewhat accidentally, it worked out really well as the raspberries and asparagus frame the room in by the middle of July in all the right ways.

The garden patio, my outdoor room, is irregularly shaped just like every other bed and is close to its dream come true state. We would love to add a pergola for dappled shade in the heat of summer. But it’s pretty special just as it is today.
As we worked on the layout, we used stakes to mark possible paths to get a feel for the space. We played with different path widths to see what felt right. We wanted to maximize the growing space while keeping the paths usable. We knew we wanted 4’ wide beds, so that was a fixed width. I used spray paint and a tape measure for the final layout before we prepared the soil. We ended up with 24” paths between beds, though the widths vary and some paths are narrower.
Perennials First
Once we had the fence up, the first permanent structures we installed were our two espalier orchard trellises. These were installed roughly at the same time as our fence, the fall before we planted anything.
Apples, peaches, plums, apricots, pears, and nectacot trees all needed a home inside our deer fence. And fruit takes time. Time in years, time. Not throw a seed in the ground and you have a tomato in four months time — possibly half a decade or more for some of these trees to bear fruit.

The espalier orchard fence was set 30” from the deer fence to allow access behind it and to prevent the foliage from growing through the fence and thus be prey to curious mouths,. We are able to get a wheelbarrow behind the espalier trellis for compost loads, which is really useful.
So, fruit first is the way to go. Always plant your perennials first. Your future self will thank you!
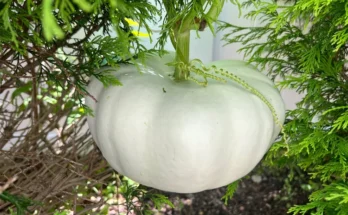
The other fruit we prioritized were our 9 blueberry plants, 50 bare root strawberry crowns, 12 raspberry canes (3 each of four different varieties), and our asparagus seedlings.
Vegetables to Follow
Because most vegetables, excepting rhubarb and asparagus, mature well within a growing season, we knew this was the final frontier for the garden. That being said, we still made sure every single growing bed was prepared and fully amended the Fall before we intended to actually plant seeds and transplant starts.
I highly recommend preparing your garden the fall before you intend to plant. It made for a much easier spring transition, allowing us to focus on what vegetables to start, what fruit varieties to order, knowing our space was ready to welcome the bare root plants and veggie starts as soon as the snow melted.
Taking the time to set yourself up for low weed pressure thus a more manageable garden is well worth the time and resources, even if it means delaying the start of the garden. We have tried to hastily garden in an old field where we just tilled and planted, and what ensued was a weedy mess that I eventually just turned my back on because it was so overwhelming.

A harvest from earlier this week in our garden. Our short growing season doesn’t deter me from making the most of the growing season, and I truly relish the challenge of growing as much food as we can in our short growing climate. Waiting to plant the garden until our second summer here was so worth the wait.
So as hard as it might be to delay planting, I highly recommend taking the extra few months to set yourself up for as successful an experience as possible. We moved here in July, installed the fence in late October, and amended the soil and mounded the beds on an unseasonably warm November weekend — months of planning and execution. We didn’t expect to grow anything until the following year. It will be easier and more encouraging to garden in a well-prepared space.